LED Strip Lights are such a versatile product due to the fact that they can easily be cut on the given cut lines and connected at any point between the copper dots on the LED Strip Lights, cut lengths vary between products. See the below tutorial for a complete guide on cutting LED Strip Lights and using quick connectors for connection.
Click Here for a Printable PDF Format Click Here to see our Strip Light Connectors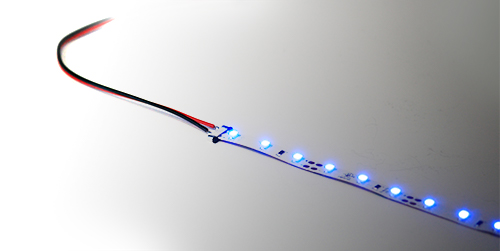
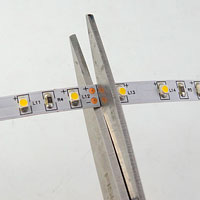
When cutting LED Strip Light it is very important to cut only on the given cut line between the copper dots. Cutting through or before the copper dots will result in no electrical conductivity to the following section.
Use a pair of sharp scissors to cut the LED Strip Light directly down the given cut line.
Quick Connectors can only be used when the top is facing upwards. It is important to determine the polarity on the LED Strip Light as well as sometimes if connecting from the opposite end wire colors can be crossed and cause confusion.
*BE SURE YOU ARE USING THE CORRECT SIZE QUICK CONNECTOR AS THEY VARY IN WIDTH DEPENDING ON THE LED STRIP YOU ARE USING.*
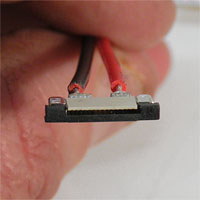
Gently pull out the black plastic piece about 1/8 of an inch. Be sure not to pull too hard and damage the quick connector.
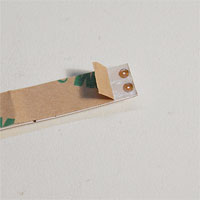
Peel back the tape of the 3M adhesive approximately 1/4 of an inch.
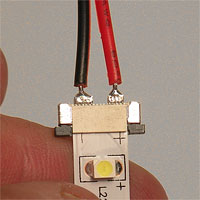
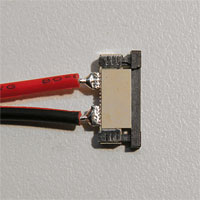
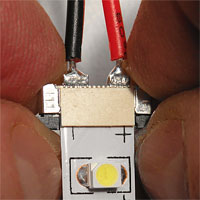
Insert Strip Light into connector, check the wire polarity (red wire to positive) copper dots should not be visible.
*QUICK CONNECTORS CAN BE USED ON EITHER END OF RIBBON. IF USED ON OPPOSITE END BE CERTAIN OF THE POLARITY AND NOTE THE WIRE COLOR REVERSAL.*
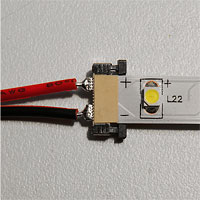
With connector between your 4 fingers, squeeze the black piece closed.
This is what a proper installation will look like, now test by connecting lead wires to a power source.