1.) Locate Included Software Disc
Each of our DMX Controllers includes a disc containing a variety of different software, specific for each controller. For our STICK DMX Controller you will be using the ESA PRO or Easy Stand Alone Pro software. Start by inserting the disc into your computer.
2.) Open Folder to View Files
Once you have inserted your disk you should get an automatic pop-up screen prompting you to Download the Sunlite Suite 2012 software, DO NOT DOWNLOAD THIS SOFTWARE UNLESS YOU ARE AN ADVANCED DMX PROGRAMMER, IT IS VERY COMPLEX. Instead navigate away from the Sunlite Suite Software and 'Open Folder to View Files.' From there we will navigate to the proper folder to install the ESA PRO software. If you do not get an automatic pop up, manually navigate to your CD-ROM Drive using 'My Computer.'
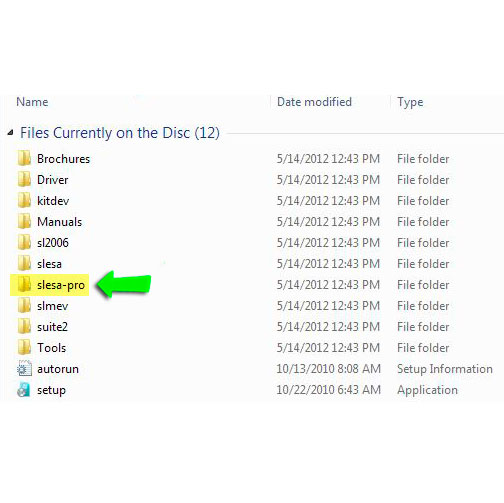
3.) Navigate to the 'slesa-pro' Folder
Once you have opened the contents of the included CD, you can now navigate to the folder named 'slesa-pro'. Double Click on the folder icon to open its contents.
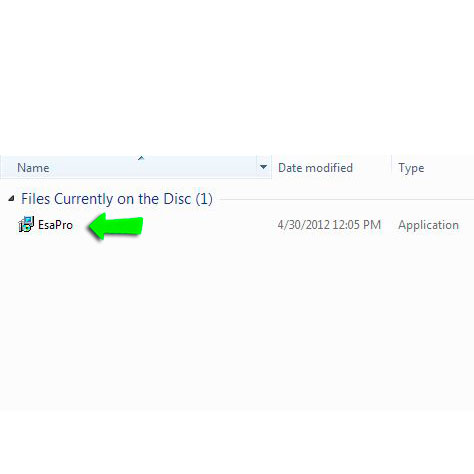
4.) Double Click the 'EsaPro' Icon and Follow the Installation Instructions
Inside the 'slesa-pro' folder you will find the EsaPro application icon to download the Easy Stand Alone Pro Software. Double click this icon and follow all of the installation steps.
BE CERTAIN TO DOWNLOAD ALL NECESSARY DRIVERS WHEN PROMPTED!
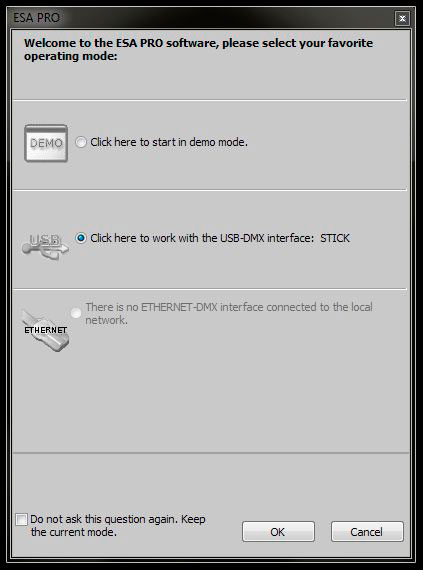
5.) Install the EsaPro Software and Start the Program
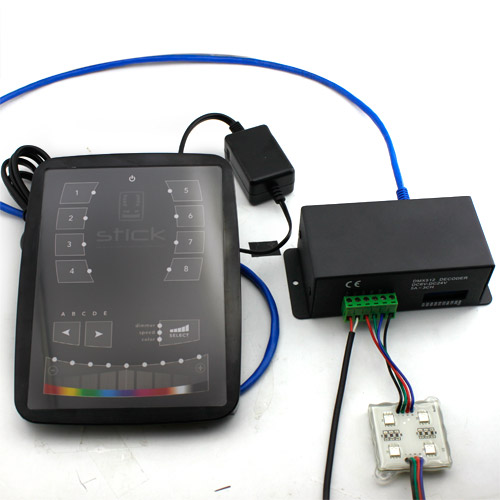
After properly installing the EsaPro Software you can now open the program. On start up you will see a screen similar to the picture on the right (click to enlarge) giving you 3 options. You can either start the program in 'Demo Mode' (no controller hooked up to computer), with the attached USB interface as seen in the picture to the right, or from an existing Ethernet connection through a local network.
Using the Software
1.) Setting up Your DMX Fixtures
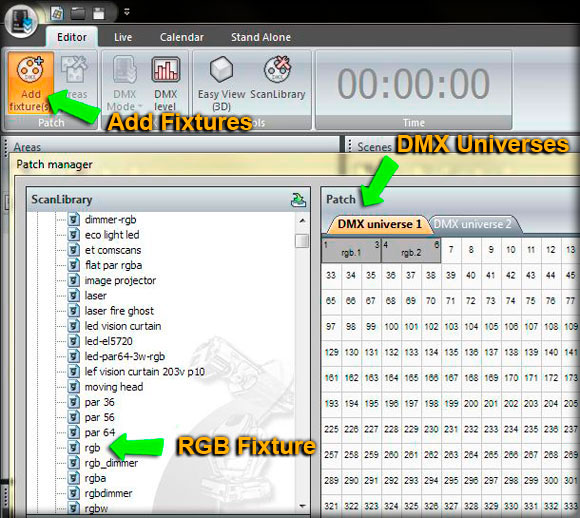
After your ESA PRO software has booted you will see the Editor Screen. This is where we will be doing a majority of our work. Start by clicking the 'Add Fixtures' icon as seen in the picture above to set up our DMX fixtures. If you expand the 'Generic' folder of your 'Scan Library' you will see a large list of fixtures. If you are using RGB LED Lights you will want to locate the 'rgb' fixture in the scan library and then click and drag it to the appropriate address in your DMX Universe table to the right. If you are using a single color light, do the same thing but grab the 'single channel' fixture.
2.) Understanding Editor Tab Options
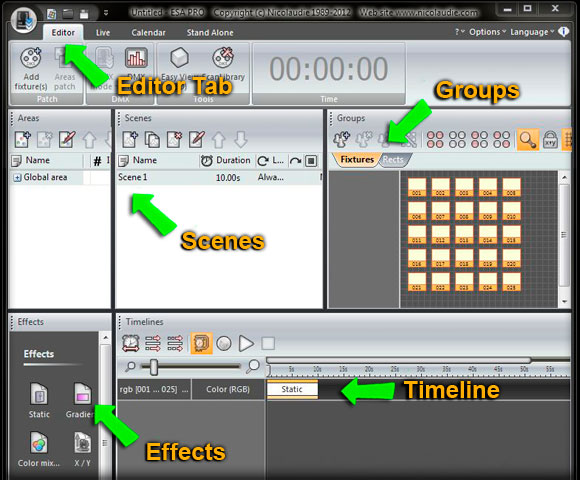
After you have setup your lighting fixtures to the appropriate DMX address you can now begin to build your lighting scenes. In your 'Editor' tab you will be using the sections labeled 'Scenes', 'Groups', 'Timelines' and 'Effects', there is also an 'Areas' section but this option is more technical than the purposes of this tutorial and only necessary for large scale applications using multiple STICK controllers over a local area network.
Scenes: There are a variety of options for your scenes including 'Duration', 'Loop', 'Next', 'Stop', 'Port', 'Scenes Order', and 'Shortcut'. Most of these options are obsolete for basic lighting scene production. Loop will give you the option of how many times you want to play your scene, next will give you the option of which scene to play after the loop and the other options are made for advanced triggering control through relays and other options.
Groups: The groups section is where you have control over your DMX fixtures. There are many group options that we will go over later in this tutorial. Take note that a fixture or group has to be clicked and highlighted orange in order to make changes on the timeline.
Effects: There are a variety of built in effects that make building lighting scenes easier. Simply click and highlight the fixture or group you would like to edit, and then click and drag an effect to the timeline. After adding an effect there will be many editing options to get the effects you desire. A rectangle group is required for RGB matrix effects, which we will go over in further steps.
Timeline: The timeline is where you will see the effects that you have created for your different lighting fixtures and groups. You can easily move the position and length of an effect directly in the timeline. REMEMBER THAT EACH FIXTURE OR GROUP MUST BE SELECTED IN ORDER TO MAKE CHANGES ON THE TIMELINE.
3.) Utilizing Fixture Groups
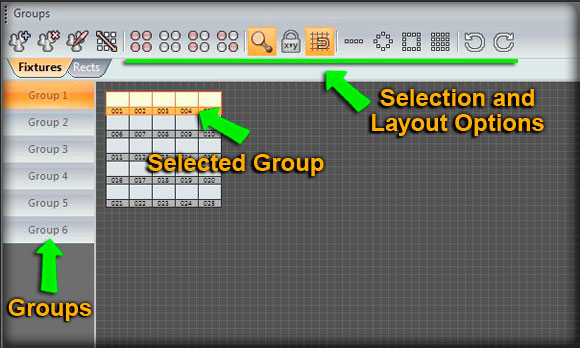
The 'Groups' section of the Esa Pro software is a very powerful and useful tool when creating your lighting scenes. To create a group simply select the fixtures you would like to group by either ctrl + click on multiple fixtures, click and dragging a selection rectangle over multiple fixtures, or using any of the selection tools in the groups section. After the fixtures you would like to group have been highlighted orange you can then hit the group add button to create your group. Once you have created a group you can now utilize many of the effect tools that are made for multiple fixtures such as 'Gradient', 'Curve', and 'Color Mixing'. Remember that the group you would like to edit must be selected before you can make effect changes on the timeline.
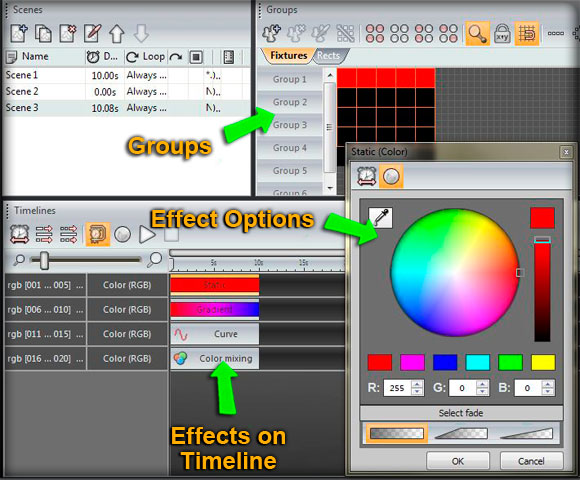
4.) Understanding your Effect Options
Static: The 'Static' effect option is used for setting static or solid colors on single or multiple fixtures. Simply select the group or fixture(s) you would like to control and then drag the 'Static' option to the timeline. From there you can choose your color by color wheel or manual numeric entry.
Gradient: The 'Gradient' effect is used for color gradients better known as a color fades. Here you can tell multiple fixtures within a group to change color and even appear to have the gradient, or color fade, moving forward. This option is great when you are building a simple color changing lighting scene.
Curve: The 'Curve' effect option gives you the option of multiple types of adjustable flashing and pulsating effects. You can set an effect on each Red, Green, and Blue channel for amazing pulsating and strobing lighting effects.
Color Mixing: The 'Color Mixing' option is one of the most unique effect tools. The color effect tool uses multiple fixtures within a group to create amazing chasing, strobing, and gradient effects such as a 'Knight Rider' and 'Sinus Wave'.
X / Y: The X / Y option is for Pan/Tilt effects, you can create more specific moving effects with the “Pan/Tilt effects” tool for all of your DMX Fixtures with moving head capabilities.
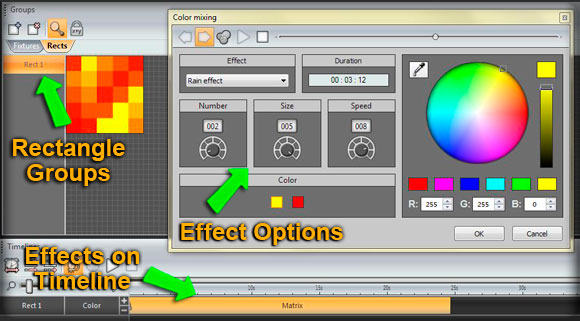
5.) Creating RGB Matrix Effects
The 'RGB matrix effects' are another great group of tools for custom lighting effects in a grid or rectangular style layout. These effects use rectangles instead of groups so any groups will need to be deleted to use this option. To create a rectangle select all of your fixtures and then click the matrix icon (square icon made of 16 small squares). You can then set the width and height of your matrix, your matrix must be complete to use this option. Once you have grouped your fixtures in your rectangular layout, you can now click the 'Rects' tab in the 'Groups' section. Click the add rectangle button and then click and drag your rectangle around your fixtures. You can mouse over the edge of your rectangle to adjust the size. Once you have created your rectangle and have it selected you can now click and drag any of the matrix options to your timeline to create a variety of color effects, display images, and even type words and letters. Keep in mind that you must have a larger matrix for images and words to be recognizable.
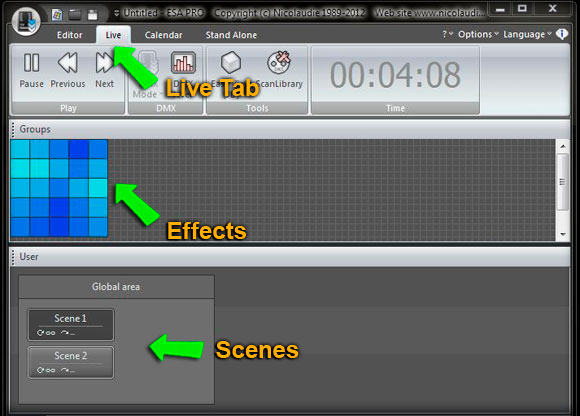
6.) Viewing Your Scenes
To view your lighting scenes in live time you can switch to the 'Live' tab at the top of the screen. From here you can click on any of your scenes and they will begin to play in live time.
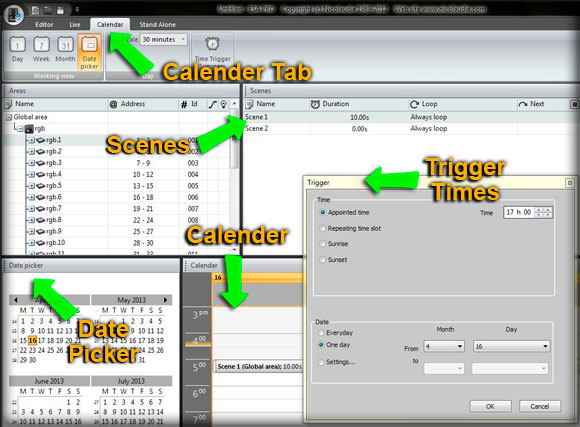
7.) Using Calendar and Time Triggering
Another great feature of the STICK DMX Controller is the ability to trigger a scene based on date and time. To utilize this function you must first set the correct date and time on your STICK. To do so plug your STICK Controller into your computer via USB cable, then navigate to the ESAPRO folder on your hard drive and open the 'Tools' application. From there you can open the Date/Time tab and then apply the current time to your controller.
After you have applied the correct date and time to your controller you can now set the calendar trigger in the Esa Pro software. After your scene is completed click on the 'Calendar' tab. From here you simply highlight the scene start date in the 'Date Picker' section, and then drag your scene to the appropriate time slot in the 'Calendar Section'. To further edit the parameters you can double click the scene bar in the calendar section. Once you trigger is complete you can save your scene to the STICK controller and the scene will play at the date and time that you had just set. THE STICK CONTROLLER MUST BE POWERED ON FOR THE DATE/TIME FUNCTION TO WORK PROPERLY, DISABLING THE BLACKOUT MODE IN THE TOOLS APPLICATION MAY BE NECESSARY.

8.) Saving Your Scenes
After you are happy with the scenes that you have created you can now save them to your DMX controller for use away from the computer. First click the 'Stand Alone' tab. From here you can click and drag your scenes to the corresponding buttons or areas that you wish the scenes to play on. For example, if I have my stick set to area 'A' I can then click and drag Scene1 to the number 1 button on area A. When in stand alone mode pressing the number 1 button on area A will trigger this scene. The STICK has a built in SD card for memory so scene size and amount is not an issue. After you have dragged your scenes to the STICK you can now click on the 'Write the Interface Memory' button to transfer your scenes to your STICK controller.
9.) Operating in Stand Alone Mode
Once you have saved your scenes to your STICK DMX Controller you can now operate the unit in stand alone mode or away from the computer. Each STICK controller includes a 9VDC transformer for Stand Alone operation. You can either install a wall plug cord to your transformer or hard wire it to any 100-240VAC power source. Once 9VDC power is supplied to the controller and the DMX output is installed to the proper LED drivers you can now play your lighting scenes away from the computer and enjoy your recently programmed lighting scenes. Thanks for reading this tutorial, if you have any questions you can always call us at 775-636-6060 or ask us a question by Clicking Here.