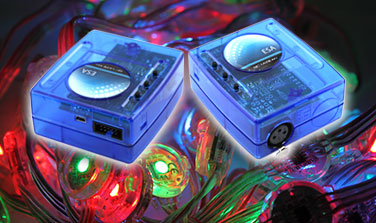
How to Use the SLESA-U9 DMX Controller
Our ESA (Easy Stand Alone) U9 DMX LED Controller is a perfect controller for both first time DMX users as well as advanced lighting designers. With the ability to control up to 256 DMX channels in Stand Alone mode, or away from the computer, this controller will allow you to create custom lighting scenes for 85 RGB Color changing fixtures or 256 single color fixtures. Operating in live mode from a Mac or PC the U9 can control an entire DMX universe or 170 RGB fixtures. Follow the tutorial below for operational instruction of the U9 DMX LED Controller.
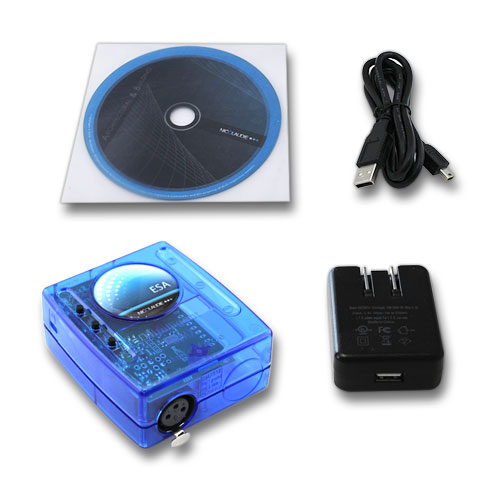
Your U9 DMX Controller will include the following pieces:
- U9 DMX Controller - 256 Channel DMX Output by XLR3 connection.
- USB Cable - Used for programming and 5VDC Stand Alone power.
- 5VDC Power Supply - Used for power in Stand Alone Mode.
- Software Disc - Disc for ESA2 PC software.
- Note for Mac Users - Mac Software is not included with the CD. To download ESA2 software for Mac Click here.
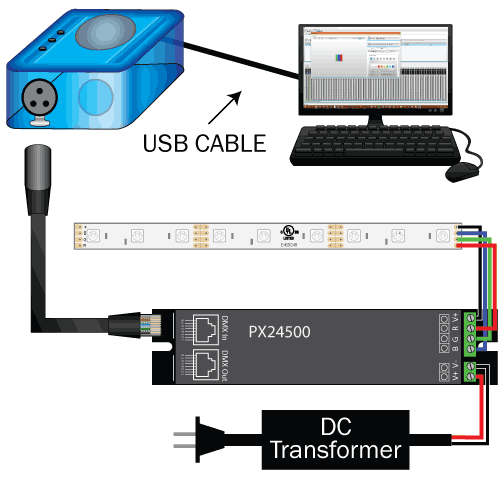
In order to output the DMX signal from the U9 controller you will need an XLR3 male type connector to either female XLR3 or RJ45 Ethernet jack. A DMX signal uses 3 wires to operate DMX+, DMX-, and Ground. If you are a more advanced user you can create your own DMX cables or solder directly to the PC board of the U9 controller. If you would like to purchase a cable click the link below to see compatible DMX cables for the U9 DMX controller.
Click Here to see compatible parts
An LED DMX Decoder is necessary to convert your DMX control signal to a PWM dimming signal for your low voltage LED Lights. Each channel of a DMX decoder will use one DMX address and can control one color of lights. A single color Light only requires one DMX channel to operate, RGB requires 3 channels, and RGBW requires 4 channels. Most of our DMX decoders have a set of 10 dip switches that can be used to set the starting address for your DMX driver.
Click Here to see compatible parts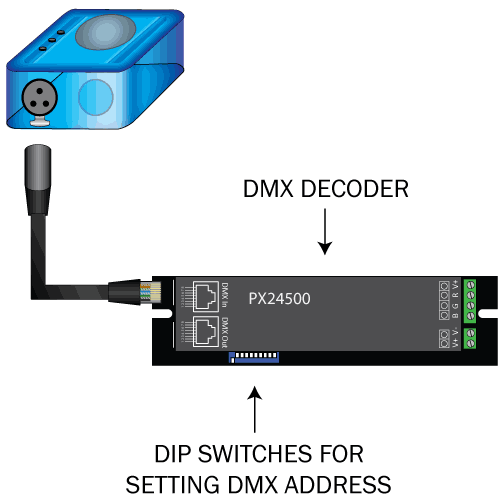
You will also need 5-24VDC constant voltage LED lights, a compatible DC power supply as well as 18-22AWG stranded connection wire to complete your DMX system. Use single color lights (1 Channel) for dimming and flashing effects or RGB LEDs (3 Channels) / RGBW LEDs (4 Channels) for color changing effects.
Click Here to see compatible parts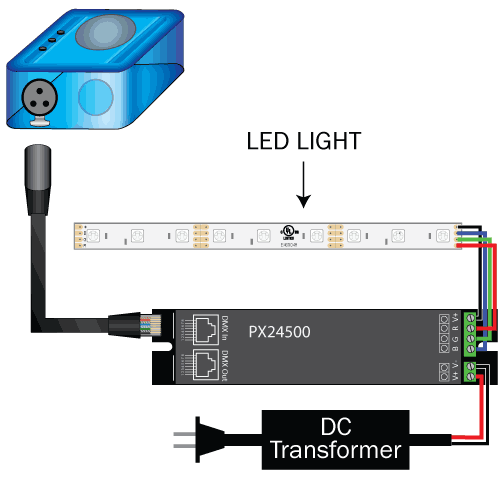
A Windows PC or Macintosh Computer is required to run the ESA (Easy Stand Alone) software from the manufacturer, see system requirements below.
- Minimum computer requirements:
- PC computer working under Windows XP
- 1 Ghz speed processor
- 512 Mb Memory (RAM)
- video card supporting Microsoft Direct 3D with 32 Mb Memory
- 1024*768 pixel screen
- Recommended computer requirements:
- PC Computer working under Windows 7
- 2 Ghz speed processor, dual core
- 1 Gb Memory (RAM)
- Video card supporting Microsoft Direct 3D with 256 Mb Memory
- 1280*768 pixel screen
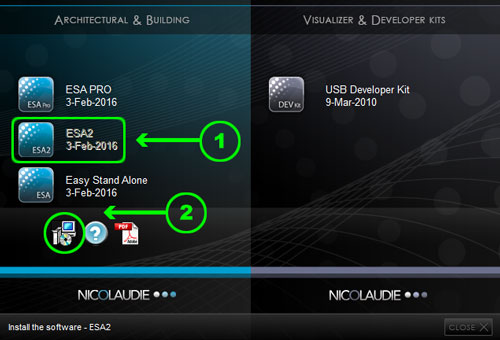
From the included disc run the auto install feature, choose your language and then choose the ESA2 software followed by the computer icon. Follow the installation instructions and download all included drivers when prompted.
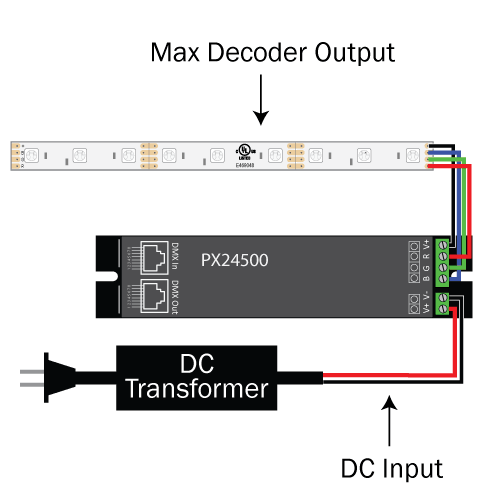
When wiring your DMX decoder there are a few things that you need to remember. The DC input voltage must be within the rating of the driver and must also match the DC voltage of the lights you are controlling. Also each unit has a max output rating per channel in amps. Do not exceed this amount with the output of your lights and be sure that your DC supply is large enough to power the load of your lights.
Note: Do not apply power to the decoder at this time.
Use compatible DMX cables to connect your DMX signal input. In order for the DMX programming to work you have to set a starting DMX address for your DMX decoder. It will help in the computer software if you start to think of your DMX decoder as a fixture. You can daisy chain multiple DMX drivers and set unique DMX addresses, as seen in the example photo, to control each fixture or set all your decoders to the same address to control all your decoders as one fixture.
Click Here to download our dip switch guide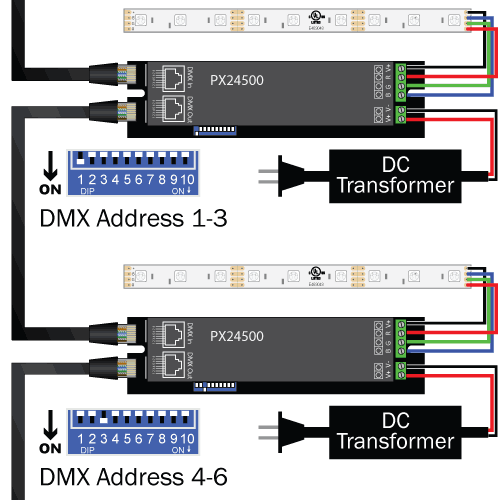
In order for the DMX programming to work you have to set a starting DMX address for your DMX decoder. It will help in the computer software if you start to think of your DMX decoder as a fixture. You can daisy chain multiple DMX drivers and set unique DMX addresses, as seen in the example photo, to control each fixture or set all your decoders to the same address to control all your decoders as one fixture.
- Power your DMX Decoder(s)
- Power your U9 Controller via USB PC Connection
- Start the ESA2 Computer Software
- Create and Save Scences
- Play in Stand Alone Mode

Related Categories
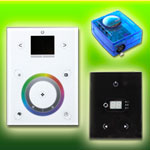 DMX LED Controls
We carry various controls and drivers to connect LED Light and RGB LED lighting to DMX512 systems. These products can be used in night club lighting, bars, casinos, entertainment, theater, movie sets and many more projects requiring control of a large number of RGB LED lights.
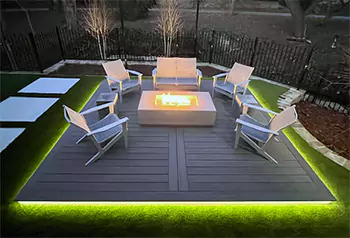 Customer LED Projects
Here you can see all of our customer's amazing LED lighting projects that were created using Ecolocity LED products and LED Lighting accessories. From LED Strip Light Projects to LED Wall Washer projects, our customer's have done it all. Browse these great finished projects to get some ideas for your next LED Lighting design.
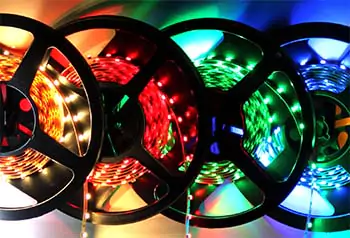 Ribbon Star UL Listed LED Strip Lights
Our commercial grade LED Strip Lights are manufactured with only the highest quality parts. Every strip light begins with a heavy duty dual core copper printed circuit board (PC Board) and then is soldered with an array of chip and color options. The backside of the PC board is applied with real deal double sided 3M tape for mounting that won't peel off. Each roll of strip can be cut and re-connected to low voltage power to create reliable UL Listed linear accent, task, and exterior lighting. We stock a wide range of brightness (lumens), IP Rating (waterproof), colors (kelvin) and color changing options below. Our strip lights are the best strip lights on the market.
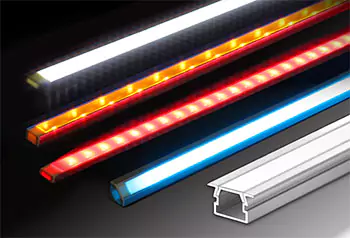 KLUS Strip Light Channels & Diffusers
Browse our wide variety of KLUS brand LED Strip Light Channels and Diffusers to create custom and quality linear LED lighting fixtures for any application. The aluminum channels, also known as LED profiles, are not only a great housing for light strips but also act as a heat sink for them as well, which in turn will expand your LEDs lifetime as well as brightness over time. Extrusions are sold in 1M, 2M and some in 3M lengths and can be cut and customized to fit any project. We have LED Extrusions for 8mm, 10mm, 12mm, doublewide, as well as waterproof outdoor rated channels. 2M lengths are available for all channels, some are available in 3M lengths, but not stocked please call 775-636-6060 to arrange a drop-ship.
 DIY LED Projects
DIY projects using LED Modules and LED Light Ribbon for easy to do and energy efficient, Do It Yourself lighting. These products can be used many different ways including under cabinets, under counters, cove lighting, in crown molding and even under stairs. These are some of the projects that we've done, if you would like to show us some of your projects we would love to see your ideas and input.
 New LED Lighting Products
Below are the newest LED Lighting products here at Ecolocity® LED. Check back frequently as we are constantly adding the newest and up to date LED Strip Lights, Strip Light Extrusions, LED Modules, LED Fixtures, LED Transformers, LED Controls, accessories and a variety of other LED lighting products. If you have any questions about any of our new or existing products feel free to give us a call during business hours or use the product question link on each product page for assistance from our technical staff.