1.) Calculate the RGB Controllers Maximum Load
On all of our RGB Controller Product web pages you can find the controllers maximum wattage load. We recommend never pushing any product to the maximum load but instead leave a 10-15% cushion as to not over drive and damage any of the product. For example, this RGB Controller can handle (using all 3 channels) 144W at 12VDC and 288W at 24VDC. Subtract 10%-15% from this number for a proper cushion, leaving you with a max load of around 130W at 12VDC or 260W at 24VDC.
2.) Determine a Sufficient Power Supply
See our Power Supply Tutorial to further educate yourself on determining a sufficient power supply for your product. Mainly you must be certain that your power supply is large enough to handle the power load that will be coming from your RGB Controller.
3.) Hook up your RGB Controller
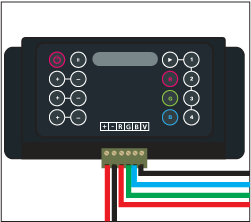
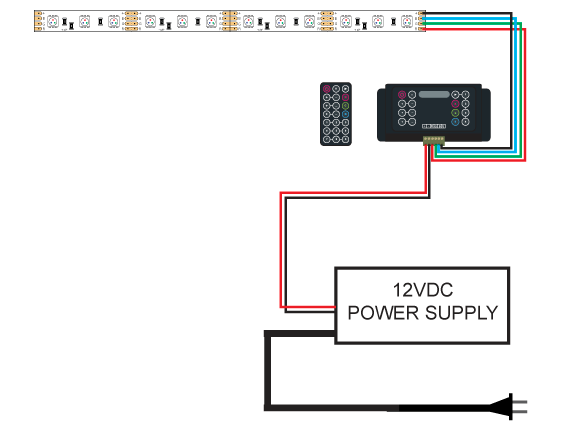
Once you have determined a sufficient RGB Controller and DC Power Supply you can then simply hook up your RGB Controller to your LED system. The RGB Controller will come after the power supply and will have a DC input for power in from your DC power supply and a four port terminal or four lead wire output to send a control signal to your LED Lights. See the illustration below for reference. If you would like to hook up a large amount of RGB LED Lights to your RGB Controller continue this tutorial for further instruction.
4.) Incorporating a Signal Amplifier
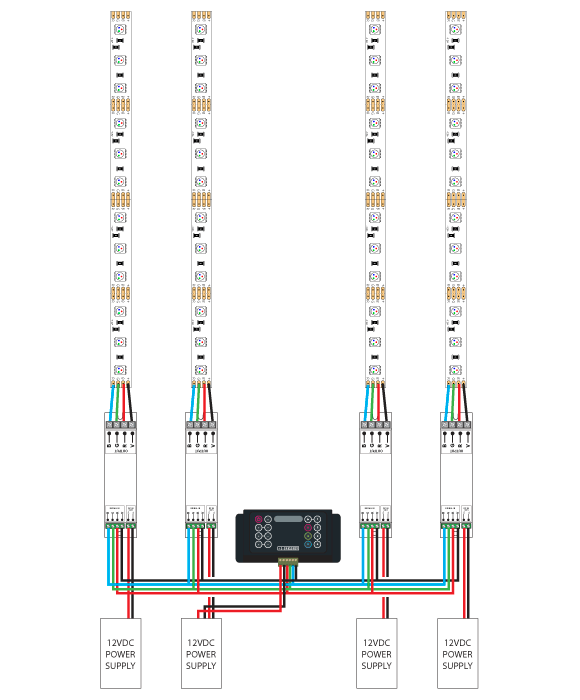
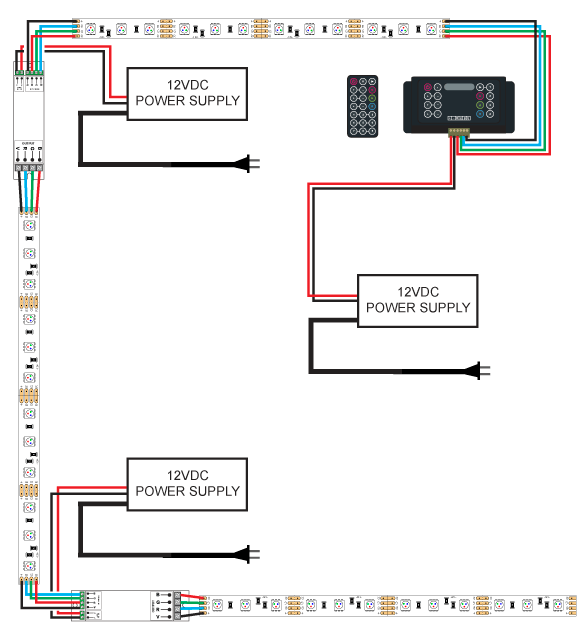
When you have a length of RGB Ribbon that has more wattage output than what your RGB Controller can handle, you must then incorporate a signal amplifier. A signal amplifier makes it possible to relay the RGB Control Signal as well as add additional power in the amount that the signal amplifier can handle. You can add an unlimited amount of signal amplifiers to your RGB LED project, amplifiers can be installed in-line with your lights or at the beginning of your setup. Note: The longer your wire runs from your signal amplifier, the weaker the signal will be to your lights, we recommend not running wire from either controller or signal amplifier over 50ft. See the illustrations below for reference.
Example of In-Line Signal Amplifier Installation
Example of Signal Amplifier Installation with components at Beginning